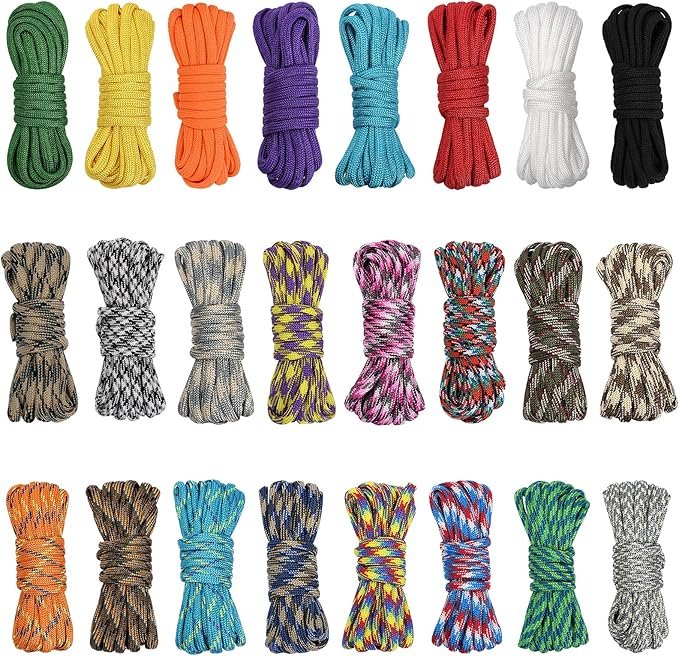
Polyester rope is a strong and popular type of rope used for many things like boating, camping, climbing, and even crafts. It’s loved because it is tough, doesn’t stretch much, and can handle different weather conditions like rain and sun. But there’s one problem—polyester rope frays when you cut it! Fraying happens when the ends of the rope start to unravel, and the rope looks messy, becomes weaker, and harder to use.
To stop this from happening, you need to seal the ends of the rope. Sealing the rope keeps the fibers in place, making the rope neat, strong, and ready to use for any activity.
In this article, we’ll explain why polyester rope frays and share some easy methods to seal the ends of the rope. From melting the ends with heat to using glue or tape, you’ll learn step-by-step how to stop the rope from coming apart. By following these tips, you can keep your polyester rope strong and in great shape for a long time.
Let’s get started!
Why Does Polyester Rope Fray?
Have you ever noticed that when you cut a piece of polyester rope, the end starts to come apart? This is called fraying, and it can make the rope look messy and become weaker. But why does this happen? Let’s explore why polyester rope frays when it’s cut and why it’s important to seal the ends.
1. Understanding How Polyester Rope Is Made
Polyester rope is made up of many tiny fibers twisted or braided together to make a strong rope.
Fibers: These are like thin threads made of polyester, a type of plastic.
Twisting or Braiding: The fibers are twisted or woven together tightly to give the rope its strength.
2. What Happens When You Cut the Rope
When you cut the polyester rope:
Fibers Get Loose: The tight twist or braid gets undone at the cut end, and the tiny fibers start to stick out.
Starts to Unravel: The fibers can continue to loosen and unwind, making the end of the rope fray more and more.
3. Why Fraying Is a Problem
Fraying can cause several issues with your rope:
Weakens the Rope: As fibers come loose, the rope becomes less strong.
Hard to Use: A frayed end can make it difficult to thread the rope through holes or tie knots.
Looks Messy: The rope doesn’t look neat and can seem old or worn out.
4. Polyester Rope Can’t Fix Itself
Unlike some materials, polyester rope doesn’t naturally stop fraying on its own.
No Natural Stop: The fibers don’t stick back together once they’ve come apart.
Continues to Fray: Unless you do something to stop it, the fraying can keep getting worse over time.
5. The Science Behind Fraying
Polyester is a synthetic material, which means it’s man-made from chemicals.
Smooth Fibers: Polyester fibers are smooth and slippery, so they don’t hold onto each other tightly once cut.
Doesn’t Melt Together Naturally: Without help, the fibers won’t fuse back together.
6. Importance of Sealing the Ends
To keep the rope strong and useful, you need to seal the ends after cutting.
Prevents Fraying: Sealing stops the fibers from coming loose.
Keeps Rope Strong: The rope stays as strong as it was before cutting.
Makes It Neat: A sealed end looks tidy and is easier to work with.
Methods for Sealing the End of a Polyester Rope
When you cut a polyester rope, the ends begin to fray, and the fibers come apart. To keep the rope strong, tidy, and easy to use, you need to seal the ends. Luckily, there are several simple methods to stop polyester rope from fraying. In this section, we’ll explain four easy ways to seal the rope ends, step by step, so you can pick the one that works best for you.
1. Heat Sealing (Melting the Ends)
Heat sealing is the most common and effective way to stop polyester rope from fraying. Polyester is a synthetic material, which means it melts when heated.
What You Need:
A lighter, candle, or heat gun
Scissors (to cut the rope cleanly)
Gloves (to protect your hands from heat)
Step-by-Step Instructions:
Cut the Rope Cleanly: Use sharp scissors to make a straight and even cut. This helps the fibers melt evenly.
Light the Heat Source: Light a lighter or candle. Hold the flame steady.
Melt the Rope End: Hold the rope end just above the flame (not directly in it). Move it slowly in small circles so the heat melts the fibers evenly.
Smooth the End: While the end is still hot, gently press it against a hard surface (like metal or wood) to flatten and seal it.
Let It Cool: Let the melted end harden before touching it.
Tips:
Don’t hold the rope too close to the flame, or it might burn instead of melt.
Work in a well-ventilated area so you don’t breathe in the fumes.
Turn the rope slowly to get an even seal.
When to Use It:
Best for quick and long-lasting results. Perfect for ropes used outdoors or for heavy-duty tasks like camping, boating, or climbing.
2. Using Electrical Tape
If you don’t want to use heat, you can use electrical tape to seal the ends of the rope. This method is safe and doesn’t require fire.
What You Need:
Electrical tape (black or any color you like)
Scissors
Step-by-Step Instructions:
Cut the Rope Cleanly: Use sharp scissors to cut the rope in a straight line.
Wrap the Tape: Take a piece of electrical tape and wrap it tightly around the rope end. Start a little bit below the cut end and wrap it a few times until it covers the fibers.
Trim the Extra Tape: If there’s too much tape sticking out, use scissors to cut the extra off.
Tips:
Wrap the tape tightly to keep the fibers from loosening.
Use high-quality electrical tape for a better hold.
Combine this method with heat sealing for extra strength.
When to Use It:
A great option when you don’t have a heat source. It’s safe, easy, and perfect for kids or beginners.
3. Whipping the Rope End
Whipping is a traditional method of sealing rope ends by wrapping them with string or twine. It takes more time but works well and looks neat.
What You Need:
Strong thread, twine, or thin string
Scissors
Needle (optional, for tying off the thread)
Step-by-Step Instructions:
Cut the Rope Cleanly: Use scissors to cut the rope evenly so the fibers don’t stick out too much.
Start Wrapping the Rope: Hold the twine at the rope’s end and start wrapping it tightly around the fibers. Make sure to cover about 1 inch of the rope’s end.
Tie Off the Thread: When you’re done wrapping, tie a strong knot to hold the thread in place. You can also tuck the thread under the wrapping for extra security.
Trim the Extra String: Use scissors to cut off any extra pieces of twine.
Tips:
Use waxed thread or twine for better grip and durability.
Wrap the twine very tightly so the fibers don’t loosen.
This method looks neat and professional, making it great for decorative projects.
When to Use It:
Perfect for crafts, boating, and situations where you want the rope to look polished and tidy.
4. Using Glue or Sealant
You can also seal the ends of a polyester rope with glue or rope sealant. This is a quick and mess-free method that works well for lighter ropes.
What You Need:
Hot glue gun, fabric glue, or rope sealant
Scissors
Step-by-Step Instructions:
Cut the Rope Cleanly: Use scissors to make a neat and straight cut.
Apply the Glue: Place a small amount of glue or sealant on the cut end of the rope. Cover the fibers completely so they stick together.
Let It Dry: Allow the glue to dry fully before using the rope. This might take a few minutes, depending on the glue you’re using.
Tips:
Use just a little glue—too much will make the rope stiff or messy.
Hot glue dries quickly and works well for polyester rope.
Rope sealant is made specifically for this purpose and lasts a long time.
When to Use It:
Best for crafts, indoor projects, or when you need a quick fix.
Comparison of Methods
Method
Pros
Cons
Heat Sealing
Quick, strong, and long-lasting.
Requires fire and caution.
Electrical Tape
Safe, easy, and doesn’t need heat.
Not as durable for heavy use.
Whipping
Neat, decorative, and very strong.
Takes more time and effort.
Glue/Sealant
Simple, quick, and mess-free.
Not as strong for heavy-duty ropes.
Comparing the Sealing Methods
When it comes to sealing the ends of polyester rope, there are several ways to do it, such as heat sealing, electrical tape, whipping, and glue. Each method has its own advantages and disadvantages, and some work better in certain situations than others. In this section, we’ll compare these sealing methods so you can choose the one that’s best for your needs.
Let’s look at each method more closely!
1. Heat Sealing (Melting the Ends)
How It Works: Heat sealing uses fire or a heat source like a lighter or candle to melt the ends of the rope. When the fibers melt, they fuse together, stopping the rope from fraying.
Advantages:
Quick and Easy: It takes just a few seconds to melt and seal the rope.
Strong and Durable: The melted ends won’t fray and will last a long time, even with heavy use.
Best for Outdoor Use: Works well for ropes used in camping, boating, or survival situations.
Disadvantages:
Requires Caution: Fire can be dangerous, so you have to be careful when using a lighter or candle.
Melting Can Be Messy: If not done carefully, the rope can burn or create sharp, hard edges.
Not Kid-Friendly: Kids should avoid this method because of the heat and fire involved.
When to Use It:
Heat sealing is perfect for strong, heavy-duty ropes or when you need a quick, long-lasting fix.
2. Electrical Tape
How It Works: Electrical tape is wrapped tightly around the end of the rope to hold the fibers in place and stop them from unraveling.
Advantages:
Safe and Easy: There’s no fire or heat involved, so it’s a safe method for anyone to use.
Quick Fix: It’s easy to wrap the tape, and it works instantly.
No Special Tools Needed: All you need is a roll of electrical tape and a pair of scissors.
Disadvantages:
Not as Durable: The tape can wear off over time, especially if the rope is used outdoors or in rough conditions.
Looks Less Neat: The tape can look bulky or messy compared to other methods.
Temporary Fix: It’s not the best choice for long-term use because the tape may peel off.
When to Use It:
Electrical tape is great for quick fixes, small projects, or ropes that won’t be used heavily outdoors.
3. Whipping the Rope End
How It Works: Whipping involves wrapping the end of the rope tightly with thread or twine to stop the fibers from fraying. It’s a traditional method that looks neat and professional.
Advantages:
Very Strong and Durable: Whipping holds the rope fibers together tightly, making it one of the strongest sealing methods.
Neat Appearance: The finished rope end looks tidy and professional.
No Fire or Heat: It’s safe to do, and there’s no risk of burning the rope.
Disadvantages:
Takes More Time: Whipping is slower and requires patience compared to other methods.
Requires Skill: You need to wrap the thread neatly and tie a secure knot to keep it in place.
Extra Materials Needed: You need strong thread, twine, or string to do it properly.
When to Use It:
Whipping is ideal for decorative projects, sailing, or situations where you want the rope to look clean and professional.
4. Glue or Sealant
How It Works: A small amount of glue or special rope sealant is applied to the cut end of the rope to hold the fibers together.
Advantages:
Easy to Do: Simply apply glue to the rope end and let it dry—no special skills needed.
Safe: There’s no fire or heat involved, so it’s safe for anyone to try.
Mess-Free Solution: Glue dries clear and doesn’t add bulk to the rope end.
Disadvantages:
Not as Strong: Glue may wear off over time, especially if the rope is used outdoors or in tough conditions.
Takes Time to Dry: You have to wait for the glue to fully dry before using the rope.
Best for Small Ropes: Glue works better for light-duty ropes rather than heavy, thick ones.
When to Use It:
Glue or sealant is a great choice for craft projects, indoor ropes, or light-duty ropes that don’t need extra strength.
Tips for Cutting Polyester Rope Before Sealing
Before you can seal the end of a polyester rope, you need to cut it the right way. A clean, straight cut makes sealing much easier and keeps the rope looking neat. If the rope is cut poorly, the fibers will stick out, making it harder to seal and more likely to fray. Here are simple and easy tips to help you cut polyester rope properly before sealing it.
1. Use Sharp Tools for a Clean Cut
To get a smooth and even cut, you need to use sharp tools. Dull tools will squash or tear the rope instead of slicing it cleanly.
What to Use:
Sharp Scissors: Heavy-duty scissors are perfect for smaller or medium-sized ropes.
Utility Knife: A sharp knife works well for thicker ropes.
Rope-Cutting Tools: Special tools are made for cutting ropes quickly and cleanly.
How to Do It:
Hold the rope firmly on a flat surface.
Use sharp scissors or a knife to cut the rope in a single, smooth motion.
Avoid “sawing” back and forth, as this makes the cut uneven.
Tip: If you cut rope often, invest in a rope-cutting tool or heavy-duty scissors to make the job easier.
2. Wrap the Rope with Tape Before Cutting
Wrapping the rope with tape helps hold the fibers in place while you cut. This keeps the ends neat and prevents the fibers from spreading out immediately.
What to Use:
Electrical tape (best choice because it’s flexible and sticks well)
Masking tape or duct tape (if you don’t have electrical tape)
How to Do It:
Wrap the tape tightly around the rope where you plan to cut.
Make sure the tape is snug and covers about an inch of the rope.
Use sharp scissors or a knife to cut through the tape and rope at the same time.
Remove the extra tape or leave it on until you’re ready to seal the ends.
Tip: Wrapping tape is especially helpful for thicker ropes or ropes that are harder to cut cleanly.
3. Cut on a Flat, Stable Surface
Always cut polyester rope on a flat surface to give yourself more control and make a clean cut.
Best Surfaces to Use:
A wooden table or cutting board
A flat piece of cardboard
A self-healing cutting mat (often used for crafts)
How to Do It:
Lay the rope flat on the cutting surface.
Hold the rope securely with one hand to keep it from moving.
Use your cutting tool to slice straight through the rope in one motion.
Tip: Avoid cutting ropes in mid-air or on soft surfaces like fabric, as the rope will move, and the cut will be uneven.
4. Measure Before You Cut
It’s always a good idea to measure the rope before cutting to make sure you have the right length. If you cut the rope too short, you won’t be able to use it for your project!
Tools to Use for Measuring:
A measuring tape
A ruler
How to Do It:
Measure the length of rope you need for your project.
Mark the spot where you want to cut using a marker or piece of tape.
Double-check your measurements before cutting to avoid mistakes.
Tip: When in doubt, cut the rope slightly longer. You can always trim off more later, but you can’t add length back.
5. Melt While You Cut for Extra Clean Edges
For an even cleaner edge, you can cut and seal the rope at the same time using a hot tool. This method is great because it melts the fibers as you cut, so the rope doesn’t fray at all.
What You Need:
A rope-cutting tool (hot knife) or a heated blade
How to Do It:
Turn on the hot knife or heated blade. Let it get hot.
Place the rope flat on a cutting surface.
Press the hot blade down on the rope and slice through it slowly.
The heat will melt the ends as it cuts, sealing the fibers in place.
Tip: Be careful when using hot tools—wear gloves and work in a safe, open area.
Conclusion
Sealing the end of a polyester rope is an important step to prevent fraying and keep the rope strong, neat, and ready for any task. Whether you are using the rope for camping, boating, crafting, or everyday projects, sealing the ends makes a big difference.
There are several simple and effective ways to seal the rope:
Heat sealing is quick, strong, and perfect for outdoor or heavy-duty use.
Electrical tape is safe, easy, and works well for quick fixes.
Whipping the rope with thread is a neat and durable method, especially for decorative or traditional purposes.
Glue or rope sealant is mess-free and great for small or light-duty projects.
By choosing the method that works best for you, you can extend the life of your rope and make it easier to use. Remember to cut the rope cleanly and seal the ends carefully for the best results.
With these simple tips and techniques, you can keep your polyester rope in excellent shape—strong, tidy, and ready for any adventure or project you have in mind!